Tips on how to build a raised bed with old pallets
Key ingredients (for a 5m x 1m bed):
6 x sturdy posts (cut to approx. 1m) – take a saw and create a point at the end of each to make it easier to hammer them into the ground
Lengths of wood – cut to approx 2.5m and 1m
1 x large heavy duty hammer/mallet
Normal hammer
Thick nails
Spade
2-3 helpers (ideally including one strong person)
Ideal conditions:
Sunshine, temperatures +1C
Good company – boyfriend, family, friends, fellow allotmenteers
Ground conditions that are not frozen or muddy (although I’ve made raised beds in both and they’ve turned out ok)
Time frame:
Allow 2 hours

Mum – my ever cheerful helper

Dad – the project manager

Iain – the strong helper with the hammer
Using raised beds to grow your fruit, vegetables and flowers is the way forward. Here are what I see as the key benefits:
It makes it easy to follow a crop rotation system (especially if you have four beds)
You don’t step on the soil so it stays light and easy to weed
It allows you to concentrate your time and effort on those key raised areas (helpful if you have a big plot which may otherwise seem daunting/unwieldy)
If you build your raised beds with high sides it can deter certain pests, such as carrot fly
Stops you from getting a sore back
Looks neat and tidy
After all the snow and ice we’ve had lately, I was eager to get up to the allotment yesterday to build the much discussed and long awaited raised bed no.5. It will be used exclusively for cut flowers this spring / summer and will sit alongside my four other beds which I use for growing vegetables.
Here’s my top tips for how to make a raised bed from scratch:
Step 1: make sure you have all the necessary equipment (outlined above). There’s nothing more frustrating than being ready to build and then realising you’ve forgotten your hammer.
Step 2: take some canes and stick them in the ground to mark out the perimeter of your raised bed – take a piece of string and tie round each cane. This will help ensure you have straight lines. Position your corner posts beside each cane and dig a trench approximately 1 to 2 inches deep from post to post along the marked edges.
Step 3: using the big hammer/mallet, hammer post 1 into the ground. Align the second post using the string and hammer in. Take a 2.5m length of wood and hammer into your posts with a long nail to ensure alignments. Progress to the third post, hammer in, and replicate with 2.5m length and nails.
Step 4: do the other side in exactly the same way (make sure your two top posts and two bottom posts also form a straight line. Hammer in your 1m lengths to complete each end.
Step 5: you should now have a raised bed. Now all you need to do is fill it with compost and you are ready to go!
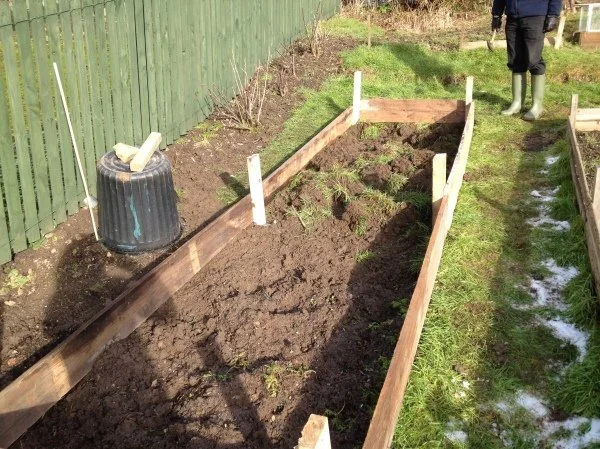
The final product!